Manage Project Tasks
Project Tasks are the more granular level work items that are undertaken within a project, which would typically last anything from an hour to 2-3 days. It is designed to plan and track work items but not as a tool to track and bill time - that is done at the Activity level.
Project Tasks are listed on the Tasks tab on the Project page. The list will provide a summary of each task including billing data if the project has billing enabled.
Creating a Project Task
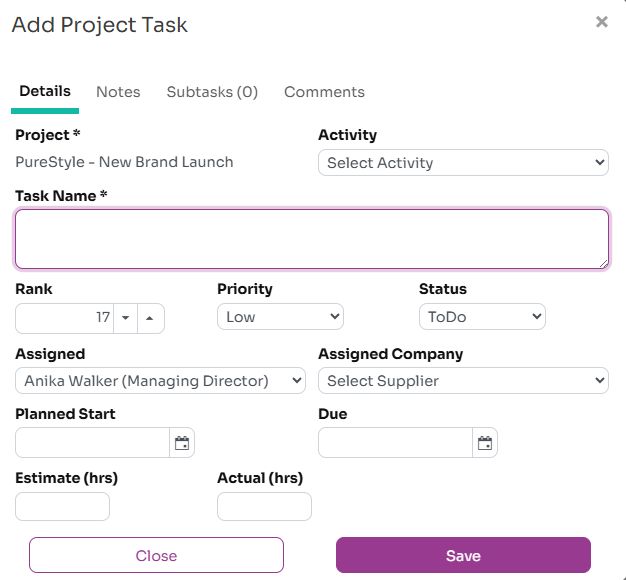
This is done by pressing the Add New Task button on the Tasks tab on a Project page. Tasks can also be created via the My Tasks tab on the My Status page, or the Tasks tab on the Team Status Page. Clicking on Add New Task will bring up the Add Task dialog. The fields that can be entered when creating a Project Task are described below:
- Project: A task must be assigned to a project. This will either be pre-populated (if accessing via the Project page) or you need to select a project from the drop-down list
- Activity: Tasks can be assigned to an Activity within a project, however this is optional
- Task Name: A name for your task. This does not need to be unique, however we recommend that it is.
- Priority: Select Low, Medium or High from the dropdown. The default is Low.
- Status: Select ToDo, InProgress, OnHold or Complete. This will determine it's position within the Board view and the GroupBy filter.
- Assigned: Select the individual that is assigned the task. This can be updated later. It is defaulted to the user creating the task.
- Due: The Due date for the task
- Estimate (hrs): The estimated effort for this task in hours
- Actual (hrs): The actual effort spent on this task in hours
- Description: Here you can include details on the task, such as instructions or success criteria
Once you have filled in the details you can Save the task and it will appear in the Board View or List View (and also in a Team View on the Team Status Task Tab)
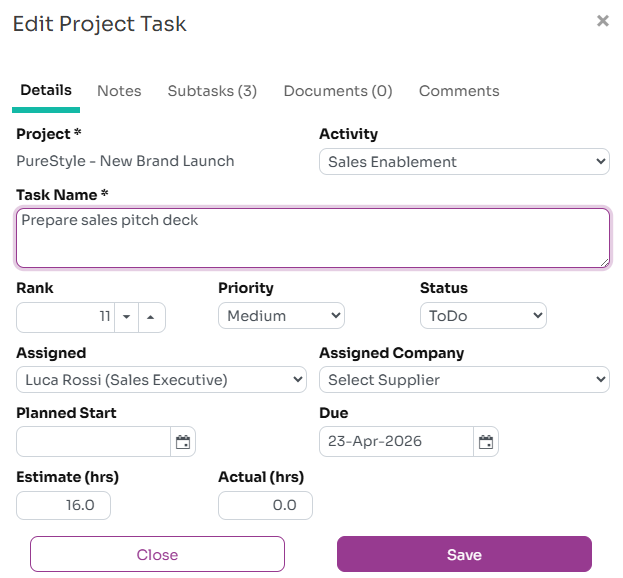
Additional Task Details
There are additional tabs on the Project Task dialog that allows you to enter more detailed information on the project task:
- Notes: add rich text notes to the task including adding links and images
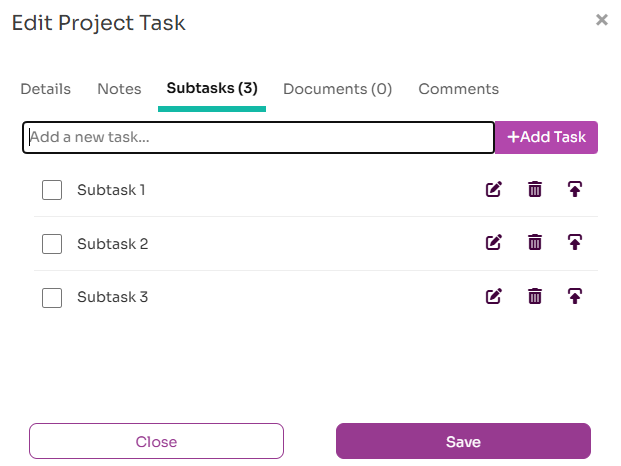
- Subtasks: can add one or more subtaks to the task
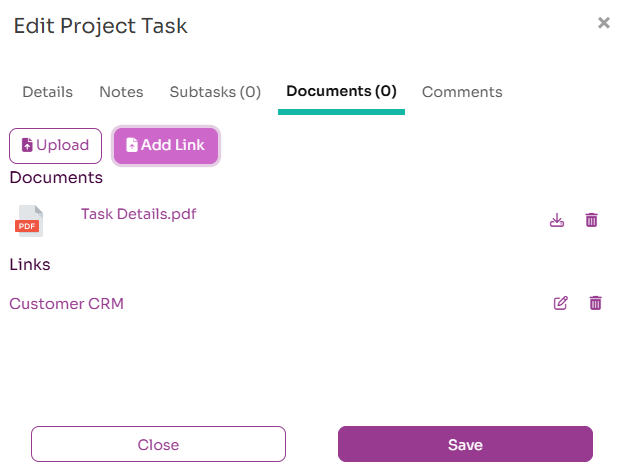
- Docs and Links: can add documents and links directly to the task
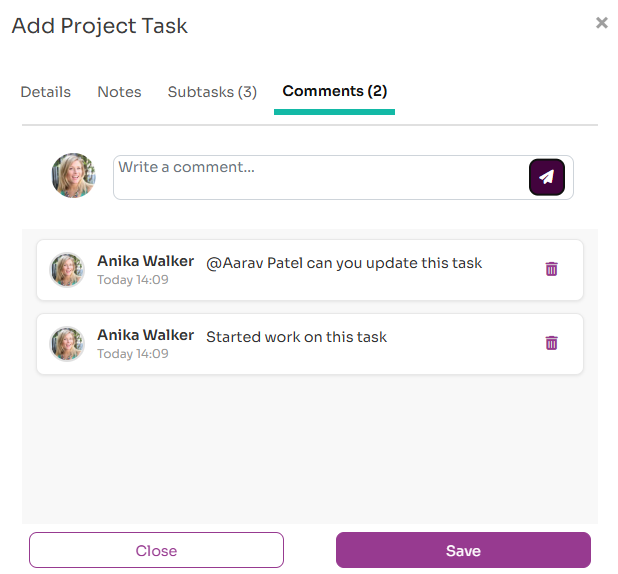
- Comments: add additional comments to the task as progress made
Subtasks allow you to enter individual task items to the task to break it down. You can mark individual subtasks as complete. You can also promote a subtask to a project task.
The Notes tab allows you to add rich text notes to the task which can include bullet points, links and images.

Documents and web links can be added on the Docs and Links tab. Use Upload to upload a document and Add Link to add a named link to an external webspage.
Comments allow you to create a log of messages and progress on the task. You can use @ to mention someone on the task and Workup can send a notification message to the user.
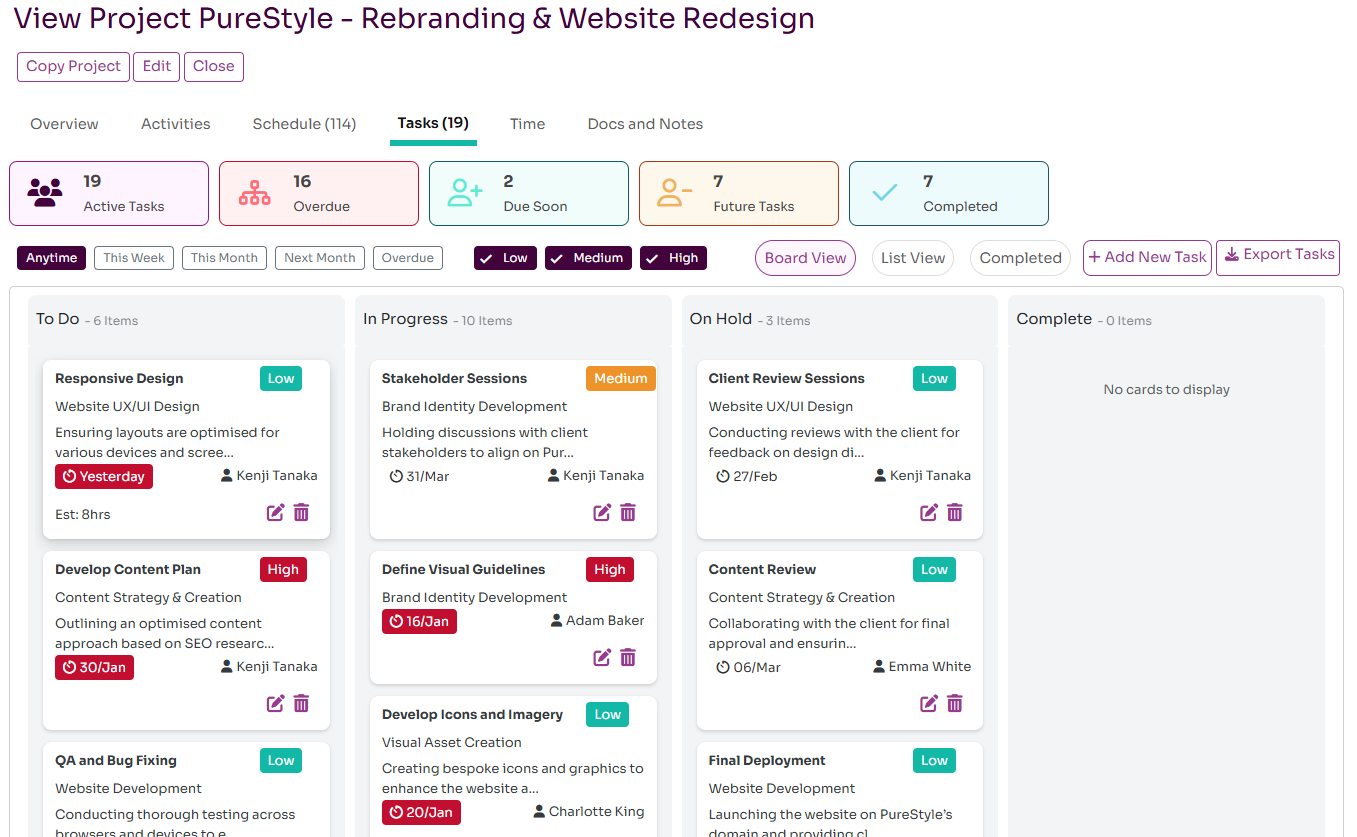
Managing Tasks as a Board
Tasks can be managed via a Kanban like board. You can drag a task to change it's status such as from ToDo to In Progress. Click on a task to view or edit it. Tasks can be grouped by certain fields such as Activity, Due date etc and can also be filtered by Due Date and Priority.
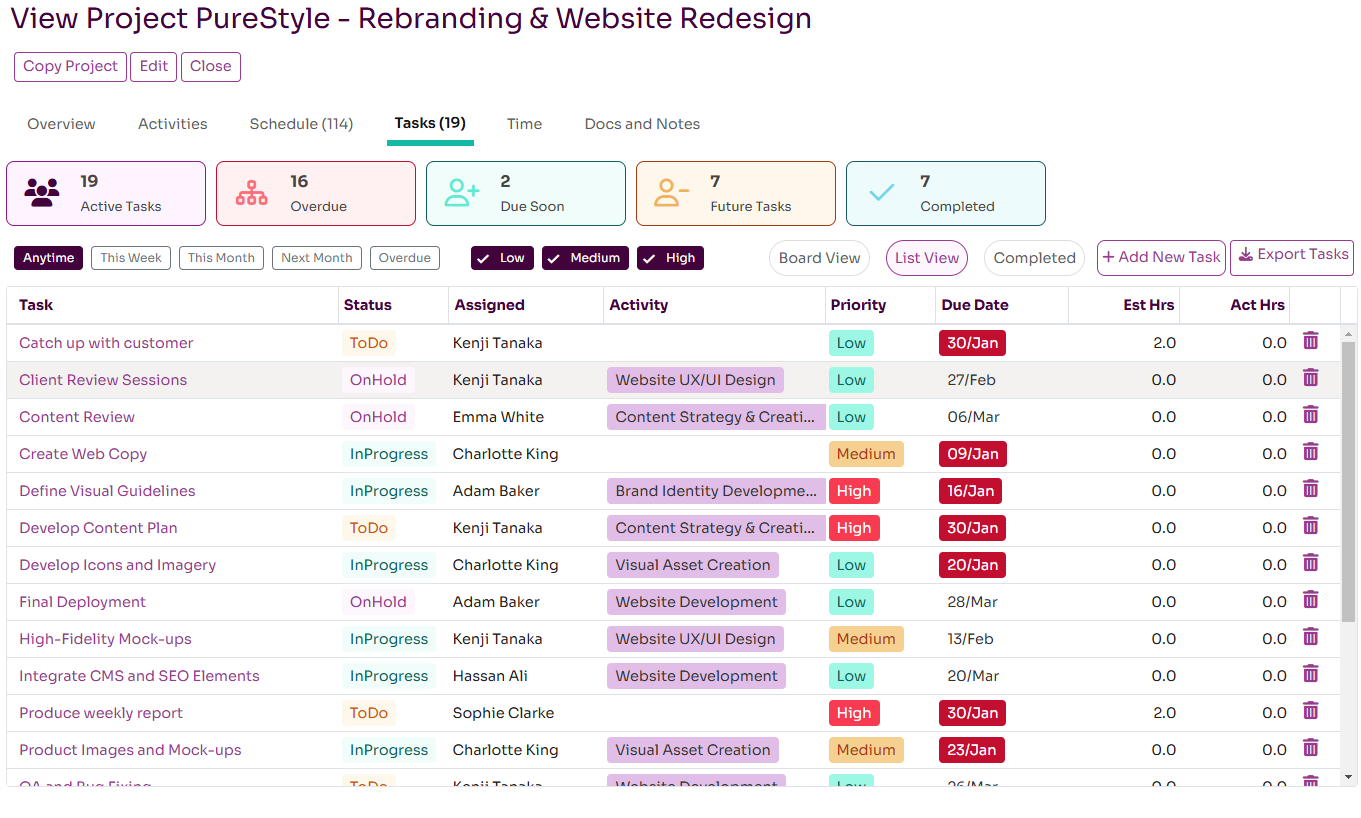
Managing Tasks as a List
The List View allows you to view tasks in a normal grid list that supports, grouping etc. It also allows you to multi-select one or more project tasks and bulk edit them using the Bulk Edit feature.
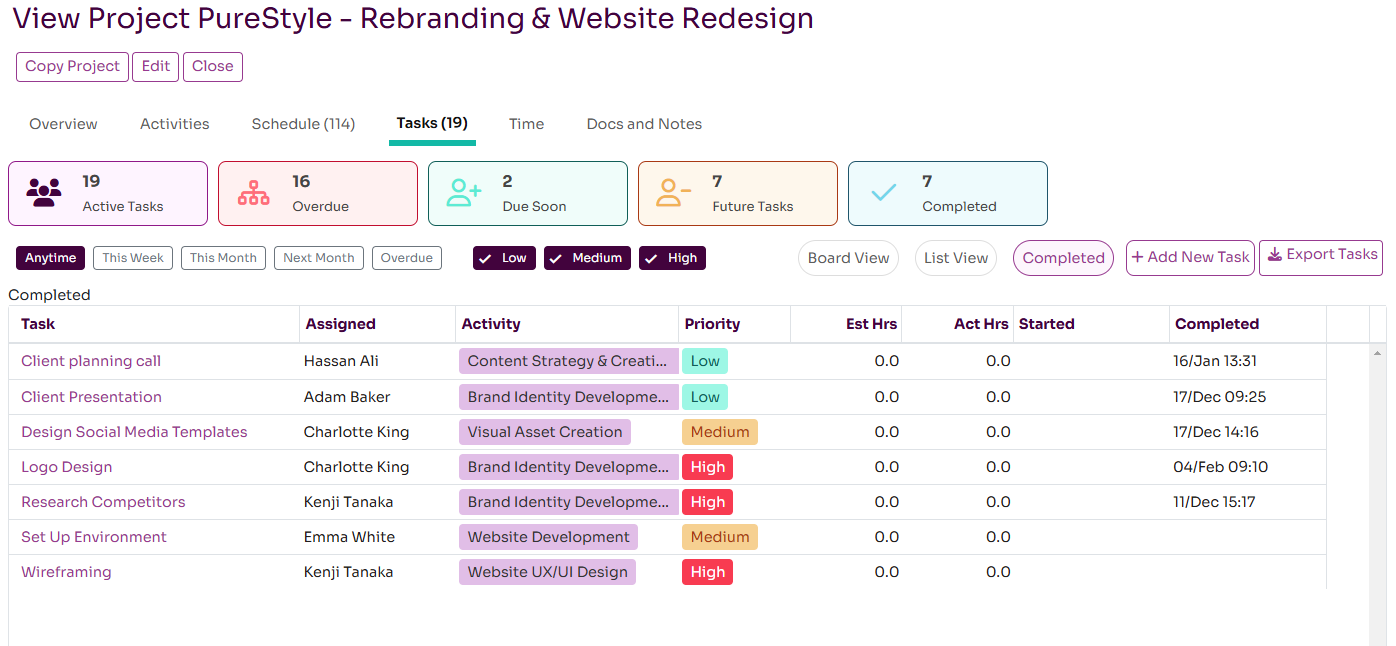
Viewing Completed Tasks
The Completed tasks view will show all completed tasks on the project and when they were completed.
Bulk Editing of Tasks
The List view of tasks allows you to multi-select tasks and bulk edit them by pressing the Bulk Edit dialog. There are a range of options available on this dialog:
- Bulk Edit Tasks: edit one or more fields on the selected task, eg assign all seleted tasks to a resource or set due date
- Mark as Complete: mark all the selected tasks as complete
- Copy/Move to Project: you can either create duplicates of the selected tasks into a target project or actually move the selected tasks to the target project.
- Save as Template: save the selected tasks as a template which can then be easily applied to another project to recreate a standard reusable set of tasks
- Bulk Delete: delete all the selected tasks. You can't undo this action.
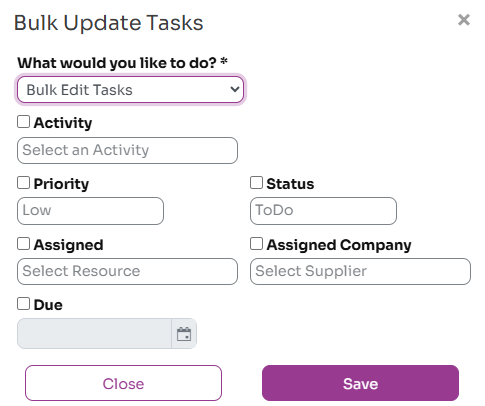
Bulk editing the selected tasks allow you to update one or more fields on all the selected tasks. You select the fields you want to update then set the required value. Fields available for this are Activity, Priority, Status, Assigned, Assigned Company and Due Date.
Task Templates
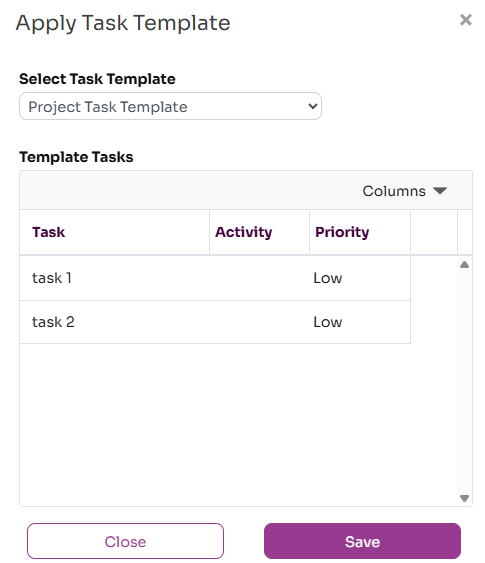
Task Templates allow you to apply a pre-defined set of tasks to any project. You can create a task template from a set of existing tasks using the Bulk Edit feature. To create tasks from a task template, go to the tasks tab on the required project and press the Load Template button. This will present a list of available templates, once you have selected one the list of template tasks is listed. Press Save to create the tasks on the current project.
Exporting Tasks
You can also export project tasks from the Project - Tasks tab by pressing the Export Tasks button. This will export all tasks on the project to an Excel s/heet.