Overview
Workup allows employees to make expense claims and for payments to be recorded. Expenses can be created in a few places; on the My Status, the People-Expenses page and the Project page. Expenses can optionally be recorded against a project and can be billable to a customer. An employee creates an expense record for each expense he wishes to claim back, this could be accomodation, travel or other types of expense.
Note: Expense functionality is only available on our Professional plan.
Making an Expense Claim
You can make an expense claim from the My Status page. Select the My Expenses tab and then press the "Add New Expense" button which will bring up the Expense dialog. You should complete an expense record for each individual expense. These can then be grouped when a payment is made to you.
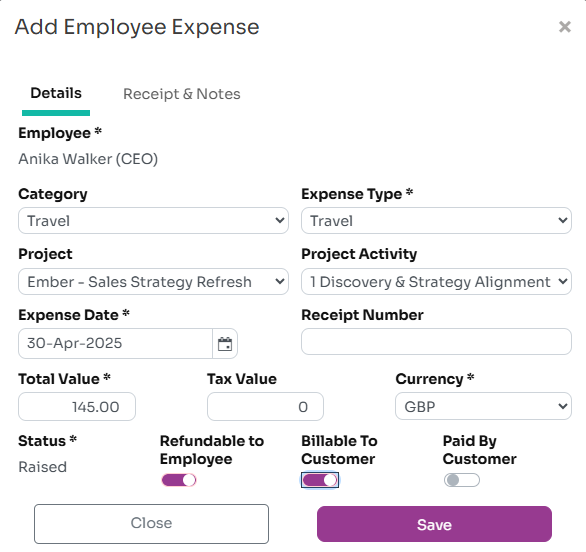
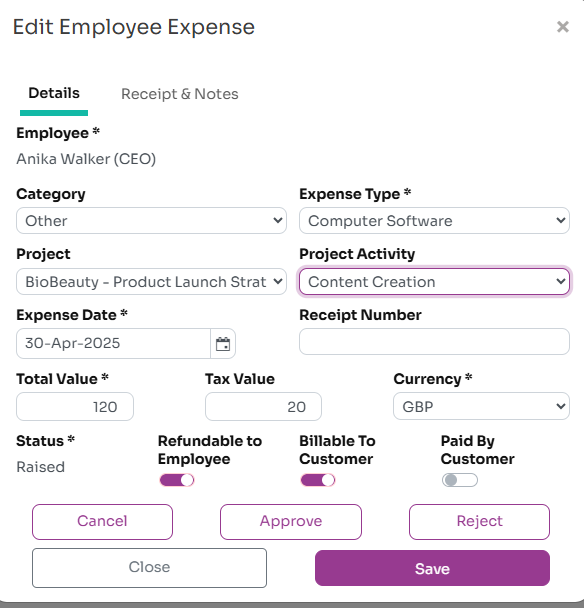
The fields available when creating am expense claim are:
- Employee: the employee making the claim, defaults to current user
- Category: an optional category for the expense
- Expense Type: the type of expense, for example accomodation or travel (required)
- Project: if the expense is related to a specific project, select it here
- Project Activity: and if related to a specific activity on the project, select it here
- Expense Date: the date the expense was incurred, defaults to today (required)
- Receipt Number: optionally enter a receipt or invoice number
- Total Value: the total value of the expense including tax (required)
- Tax Value: enter VAT or sales tax amount, if applicable
- Currency: the currency of the expense (required)
- Status: this defaults to raised, but then goes to Approved and then Paid
- Refundable to Employee: indicates that this expense does require to be refunded to the employee. May be false if the expense was paid by a company credit card for example
- Billable to Customer: indicates that this expense is to be billed and paid by the customer associated with the selected project
- Paid By Customer: indicates that this expense has actually been billed to and paid by the customer
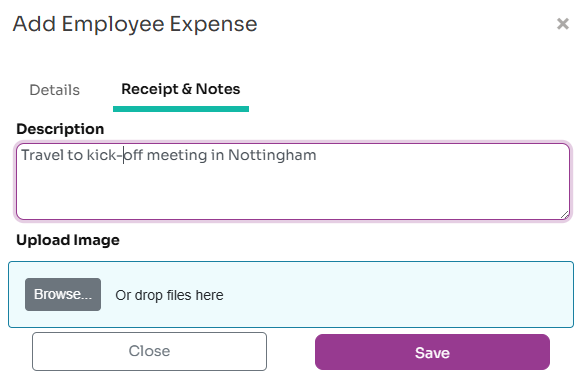
Electronic receipts can also be attached to an expense claim. On the Expense Claim dialog, select the Receipt & Notes tab which allows you to upload an image of a receipt and also enter some notes about the claim.
Before an expense is paid, it needs to be approved. An expense can be approved by your manager, the project manager or a HR or finance admin user. Once it is approved, it can then be paid to you.
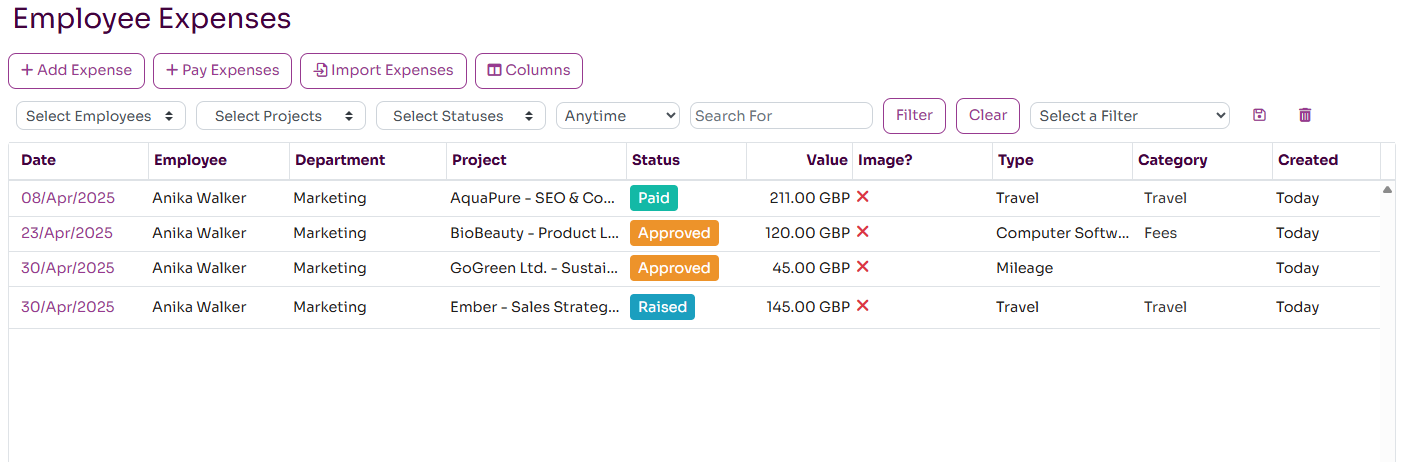
Managing Expenses
All your expenses are visible on the My Status page under the My Expenses tab. By default, all your expenses in the last 3 months are listed but you can change this to list expenses in the last 6 months, this year, last year or anytime. You can see all the details of each expense and it's current status.
If the expense is not yet Paid, you can change and resubmit the expense; it will then return to status Raised. You can also Cancel or Delete an existing raised expense.
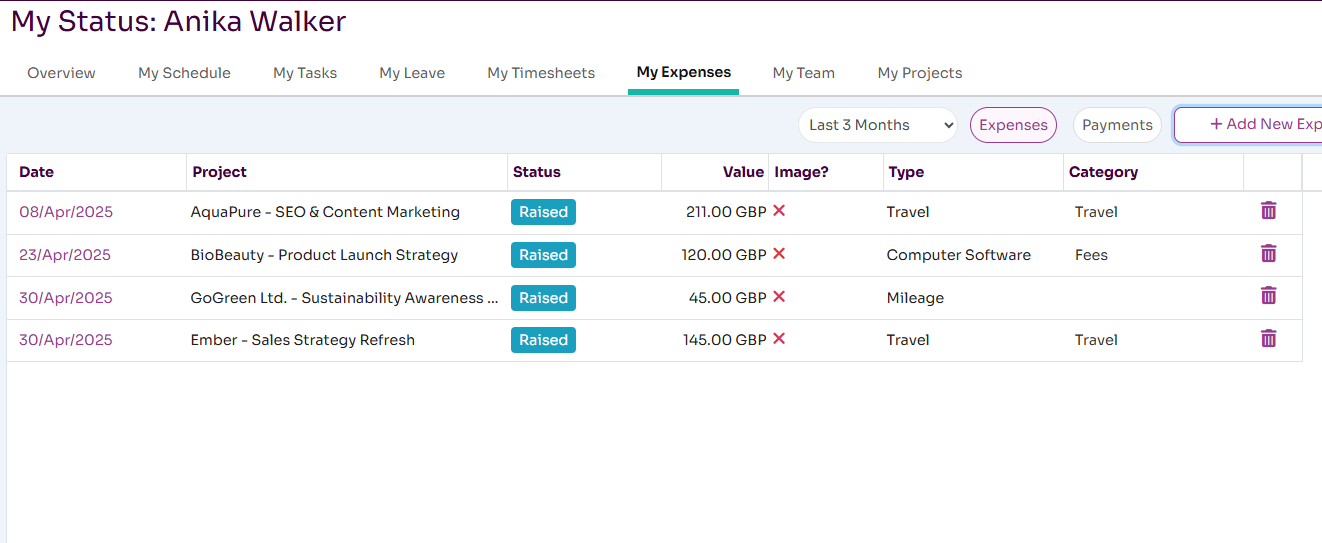
You can also view expense payments made to you by clicking on the Payments button. This will list any expense payments made to in the selected time period. These also appear on your employee record.

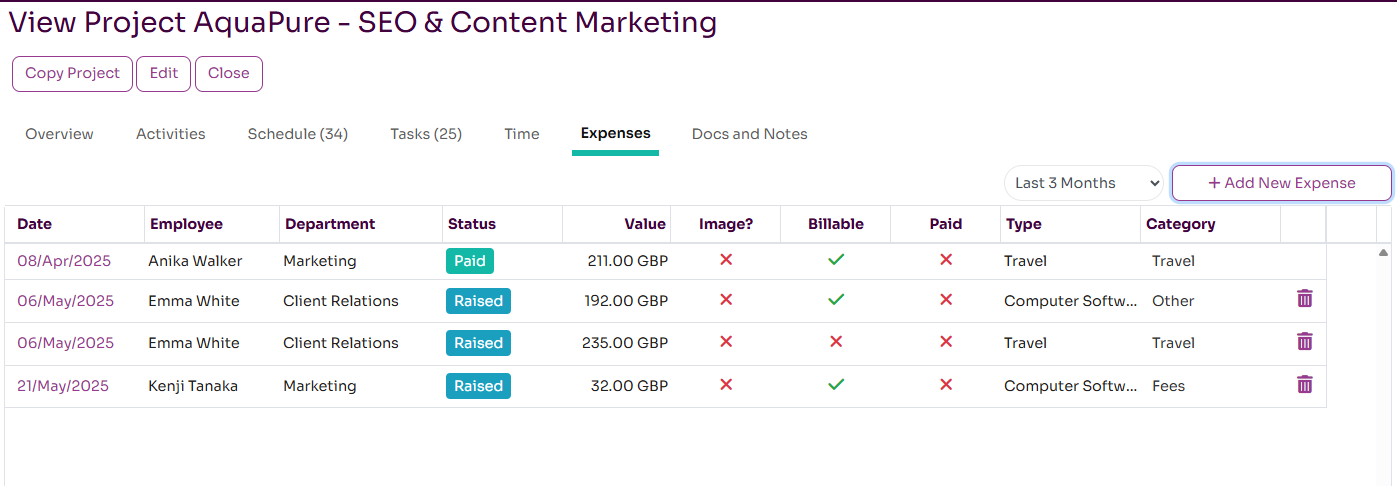
Managing Project Expenses
Expenses can be associated with a specific project and activity and these should be selected when creating an expense claim. Project expenses can be listed on the Expenses tab when viewing a project. It is also possible to create new expenses associated with the project here. It is possible for the project manager to approve (or reject) expenses here. By default project expenses are shown for the last three months but this date range can be changed.
Approving Expenses
Before an expense can be paid, it must be approved by a manager. For project expenses it can be also be approved by the project owner. Admin users with the "Maintain All Expenses" permission can also approve expenses. Once approved, the status will change to be Approved. Expenses can also be rejected, in which case the status will change to Rejected.
To approve an expense, you need to open it from the list of expenses. If the expense is at status Raised and you have permission, you will see Approve and Reject buttons; pressing these will approve or reject the expense.
Currently there is no bulk way to approve or reject multiple expenses at once, but this will be available in the future.
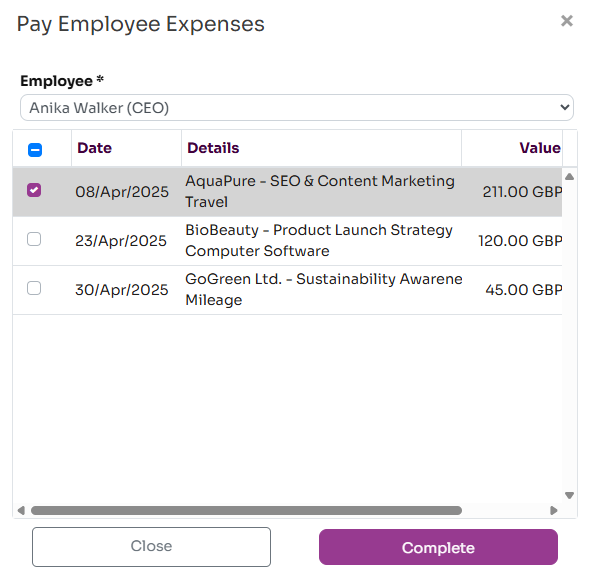
Making Expense Payments
A finance or HR user with the "Maintain Expense Payments" can record that expenses have been paid to the employee. On the People-Expenses page, you can select the Pay Expenses button which will bring up a dialog for you to make an expense payment. On this dialog, first select an employee and any outstanding expenses for the employee will be listed. Select the expenses you want to include in a payment and press the Complete button. An expense payment will then be recorded against the employee.
Workup currently doesn't integrate with your finance platform or bank so you will still need to record/make the payment in this system also.
Managing Expense Types and Categories
The list of expense types and categories is pre-populated with a default list, but can be changed by an admin user. The list of Expense Types is listed on the Admin-Lists page and the list of categories is listed on the Admin-Categories page.