Manage Users
Users can be managed from the Admin-Users page. This lists all users in the system. Users can be added or updated from this page. Workup has three different views of a User in the system; these are User, Employee and Resource. The User view is primarily around login and security details. The Employee view allows you to view and maintain employee details such as contracts, skills and the lifecycle of the employee. The Resource view provides details for scheduling and manaaging the availability of the user for projects. Creating a User also initialises the Employee and Resource view of the user which can also then be updated.

Create a New User
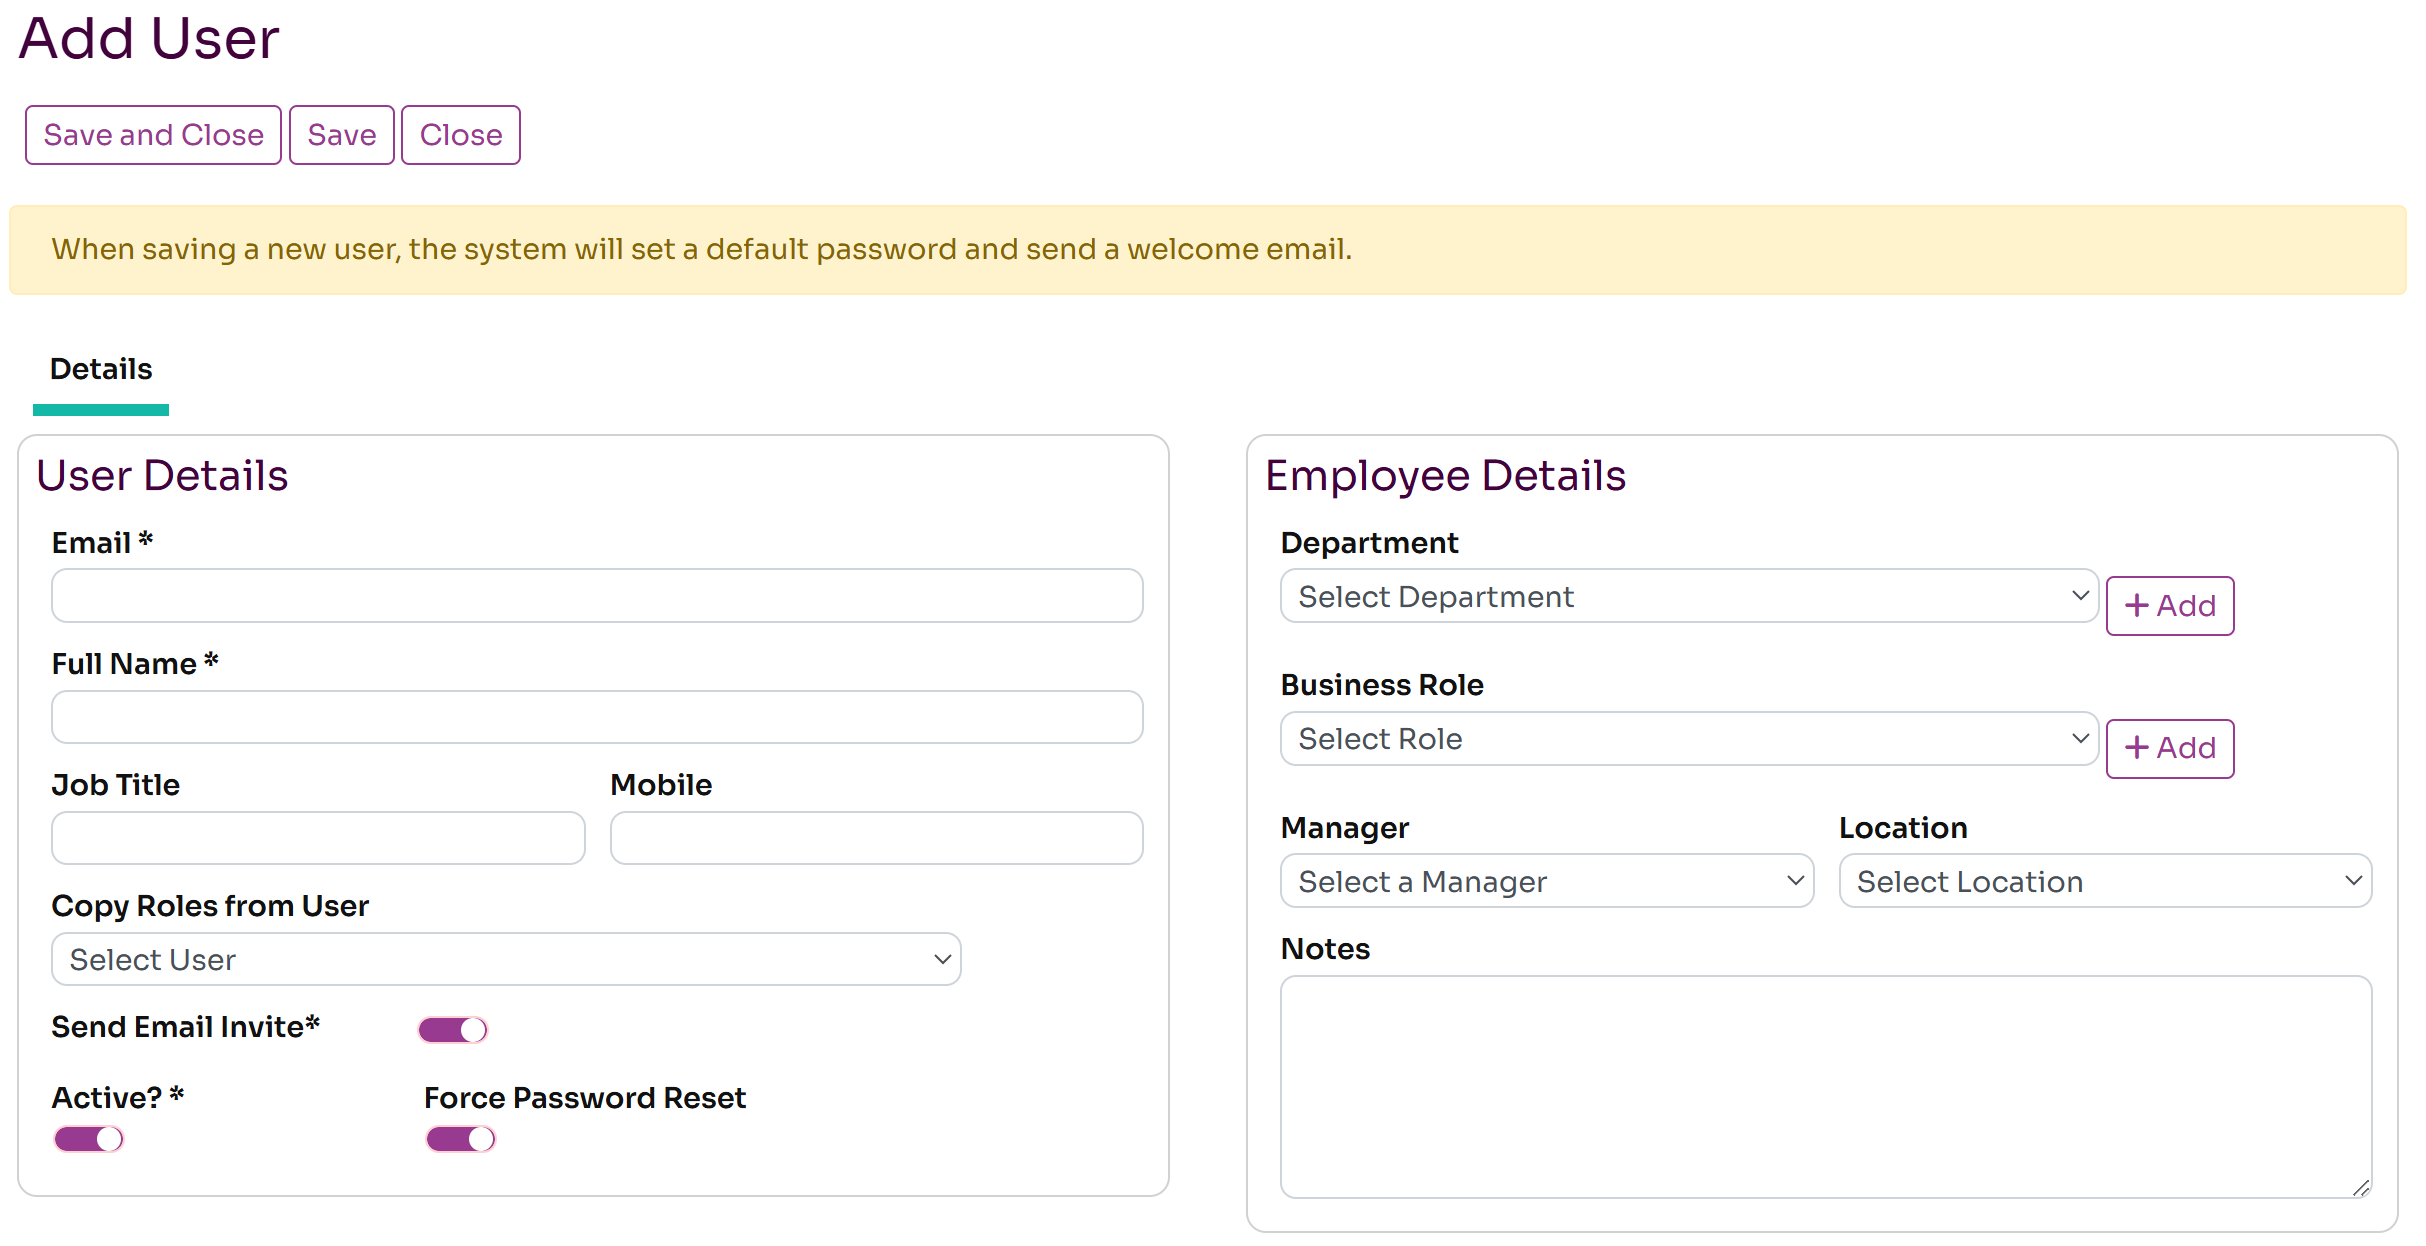
To create a new user, press the Create New button on the Users page. This will bring up the new User page that allows you to create a new user.
You can enter the following details for each user:
- Full Name: the full name of the employee
- Email: the email address for the employee. Must be unique across Workup.
- User Type: can be Standard or Associate. Associate users are a special type of limited user that is only charged when active on the platform. See here for more details about Associate users.
- Job Title: the job title for the user
- Manager: the manager for this user
- Business Role: the business role assigned to this user. A new business role can be created here
- Department: the department that the user belongs to. A new department can be created here
- Manager: the manager for this user who must be an existing user on the system
- Location: the primary location for this user
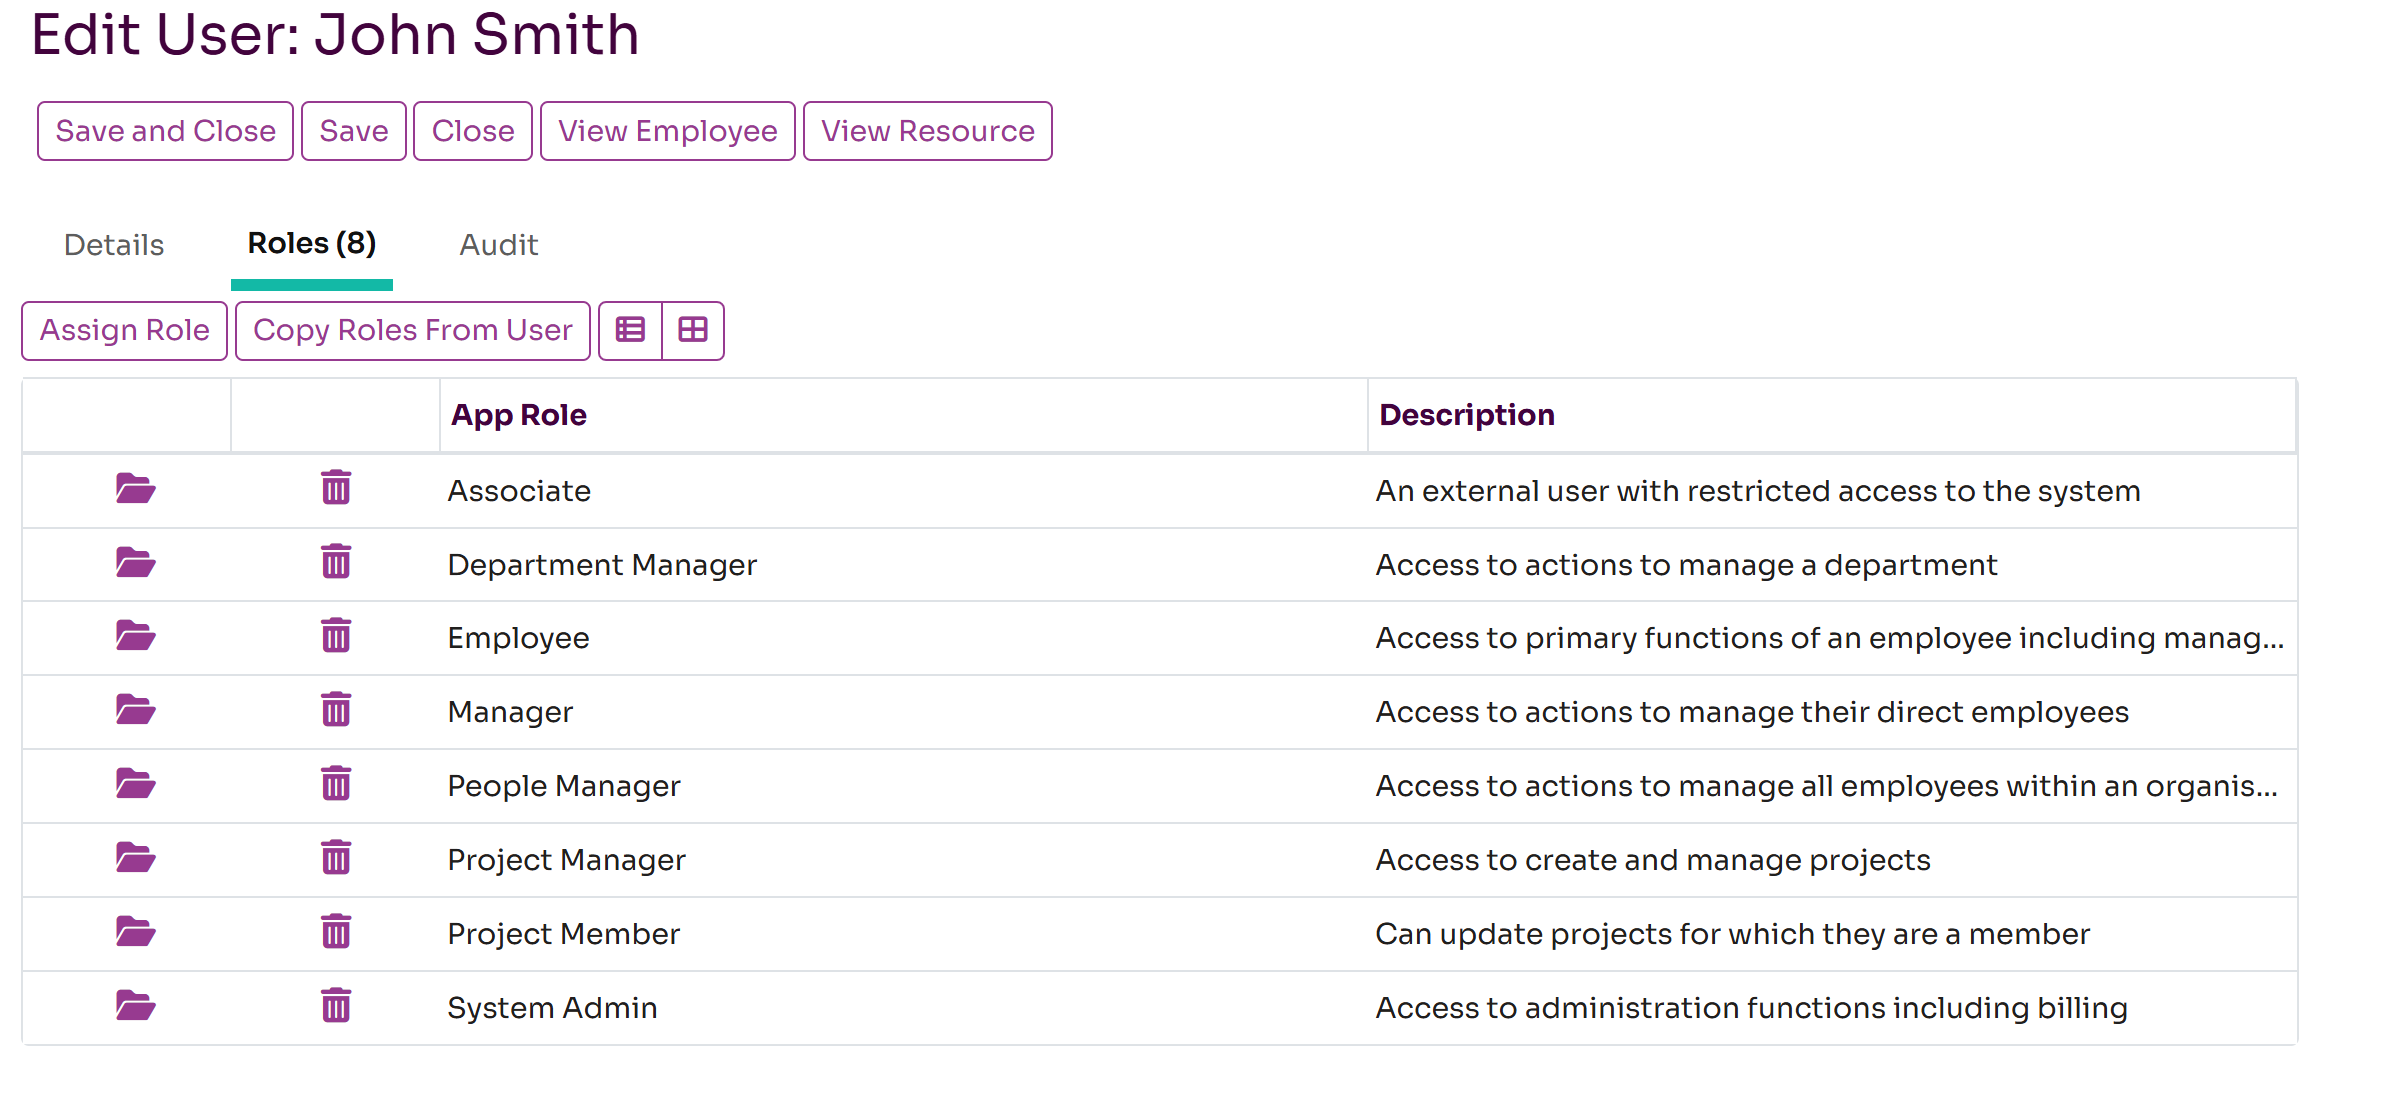
Once you save the User you can then assign security roles to the user to controlwhat actions they can perform in the system and what data they can see. If no roles are assigned to the user they only have readonly access to the application.
Update a User
You can also update a user at any time and change any of the fields for the user including name and email address. Any changes flow through to the Employee and Resource views of the user. To update a User press the edit button next to the user on the Admin-Users page. You can also change the password the user here by pressing the Change Password button. Enabling the Force Password Reset option will force the user to reset their password on their next login. By setting the user to be inactive, will prevent that user logging in to the system.
You can assign one or more security roles to a user to control what they are allowed to do and what data they have access to. Workup provides a set of standard roles such as Employee, Manager but you can create additional roles. Each user can have one or more roles and they are additive.
Import Users from a File
You can import users from an Excel file. Click on the Import button on the Admin-Users page to open the Import dialog. From there you can download an Excel template which you can then populate with user details. You can the complete the spreadsheet and upload it. The spreadsheet supports the following fields: Full Name, Email, App Roles (a list of security roles), Job Title, Business Role, Mobile Number, Notes, Title, Department, Manager, Location, Gender, Start Date, Status. The only mandatory fields are Full Name and Email. The fields Business Role and Department will automatically create the corresponding records if they don't exist. If you are creating all employees for an organisation it is recommended to list Managers first so the Manager field can be populated with the correct user.
The same file can be uploaded multiple times and the corresponding user record will be updated rather than a new user created. However, if you change the email address, then a new user record will be created.