Timesheet Overview
All time data within Workup is recorded against a timesheet; this includes leave, project schedules, actuals and billed. Because of this timesheets are created for a week when any type of time is recorded for that week. Timesheets are weekly for each user and allow time to be recorded in hours and minutes against project activities on a day by day basis.
Timesheets record time against a Project and an Activity; this is the granularity against which all time in Workup is managed and reported. It is important to configure your Project - Activity hierarchy to match how you want to manage and report time.
Listing and Opening Timesheets
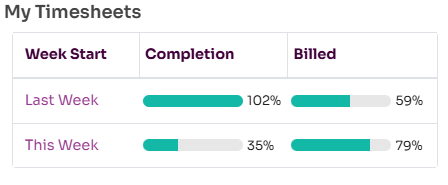
The simplest way to access your timesheets is using the My Timesheets panel on the home page which gives you one click access to this week's and last week's timesheets. It shows the completed status of each timesheet.
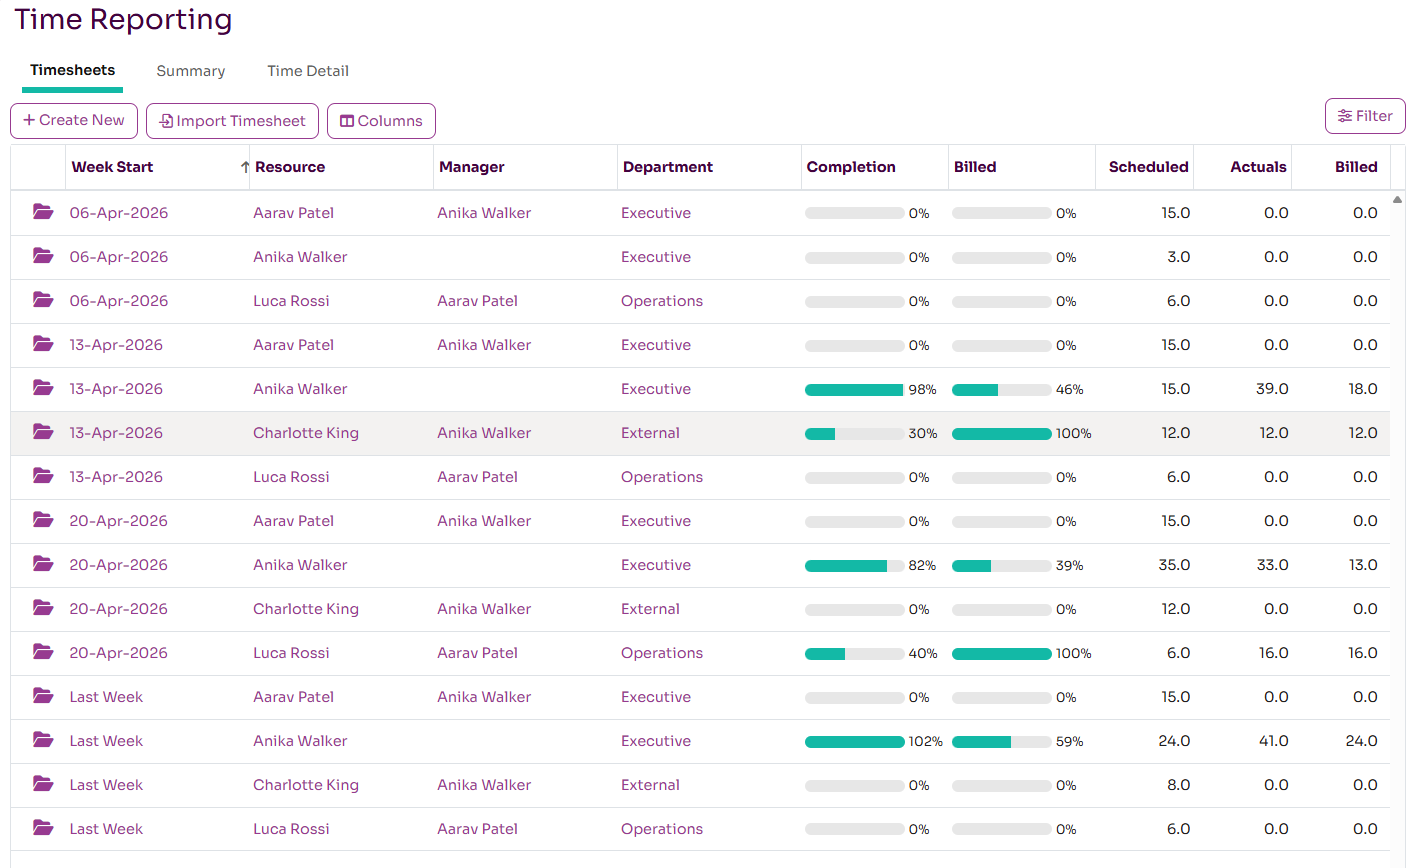
Timesheets for all users are listed on the Projects-Timesheets page and can be filtered by user and by date. Each shows the total Scheduled, Actual and Billed time recorded within the timesheet. Timesheets are also listed on the My Status page, Resource page and the Team Status page. For quick access there is also a link to this week's and last week's timesheets on the home page.
Opening and Updating a Timesheet
Click on the open icon or the week start value to open an existing timesheet. The timesheet represents the activity for a resource in a specific week. Actual time is in an Excel-like grid where you can enter values in hours directly in the grid. You need to press the Edit button to make the timesheet editable.
The timesheet shows one row per project and activity for the given week. It will default the list of activties based on previous weeks and where an activity has been scheduled for the resource in the week. To add new activities to the list, press the Add Activities button. From here you can add additional activities to the timesheet from a selected Project. You can do this multiple times for different projects.
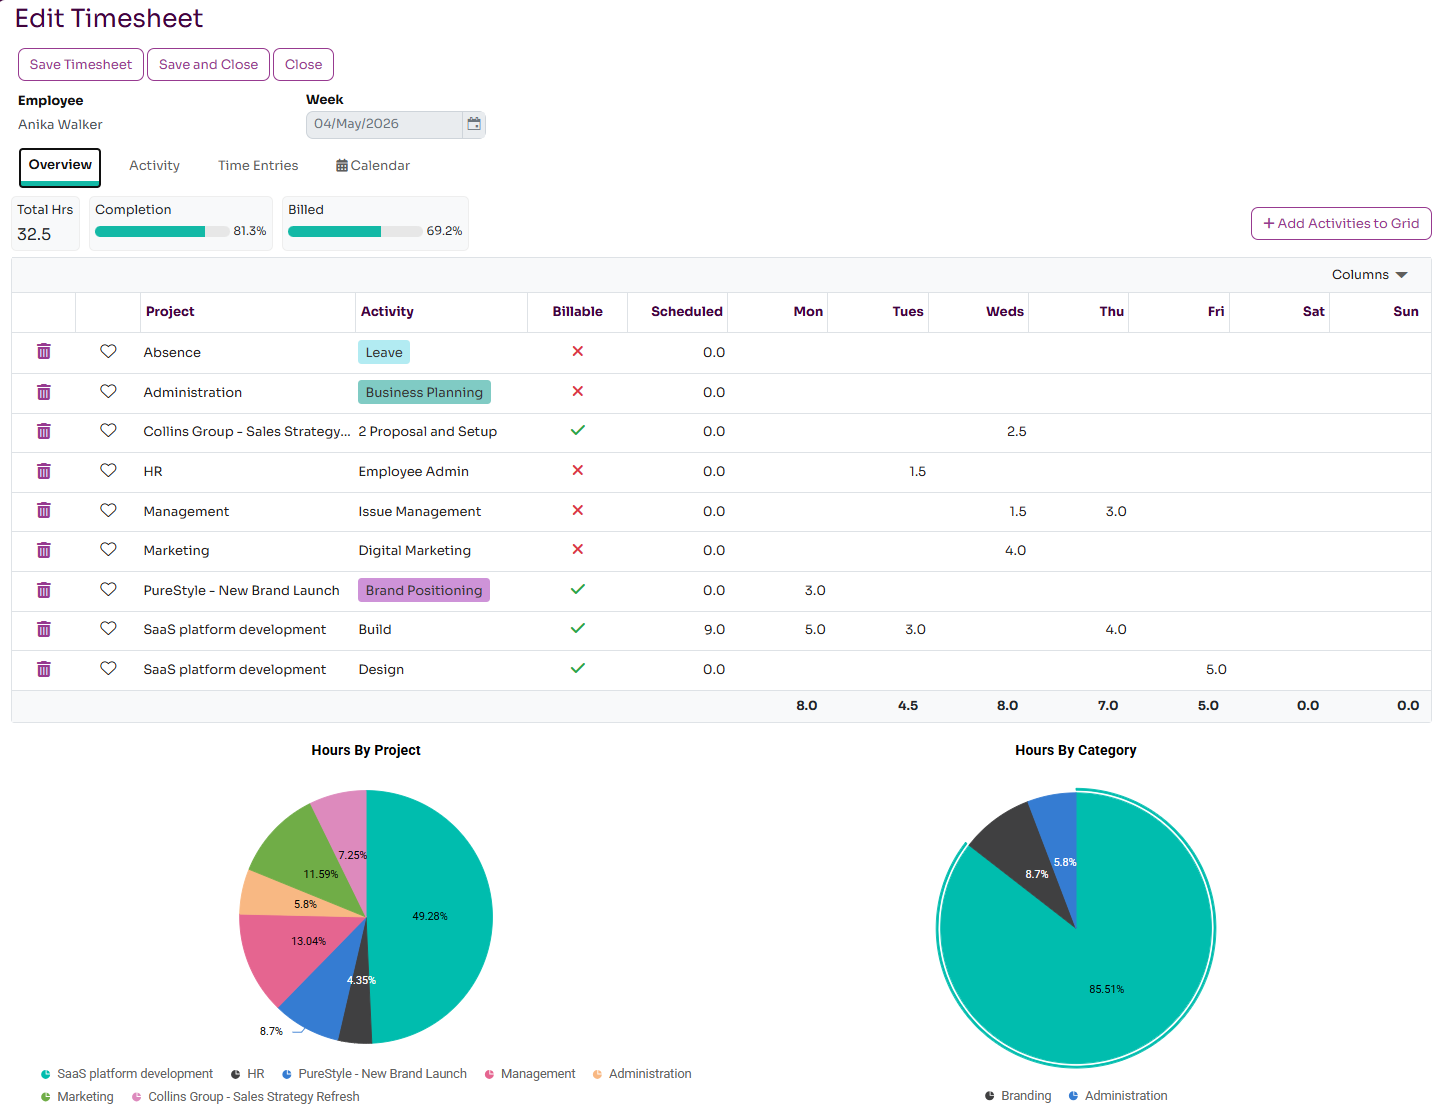
You can then enter time into the timesheet; this is recording actual times in hours. Click on a row to make it editable and then enter values into the cells. The values are stored in hours, so enter 1.5 to represent one and a half hours. The timesheet also has additional fields for you to add comments on progress in the current week and plans for the following week.
When you have finished entering values press Save or Save and Close to save the timesheet. The time entered will be recorded as actual time and can be compared to time that had been scheduled. Any activities that are billable, the actual time will also be saved as billed time. Editing of billed time directly will be available in a future release.
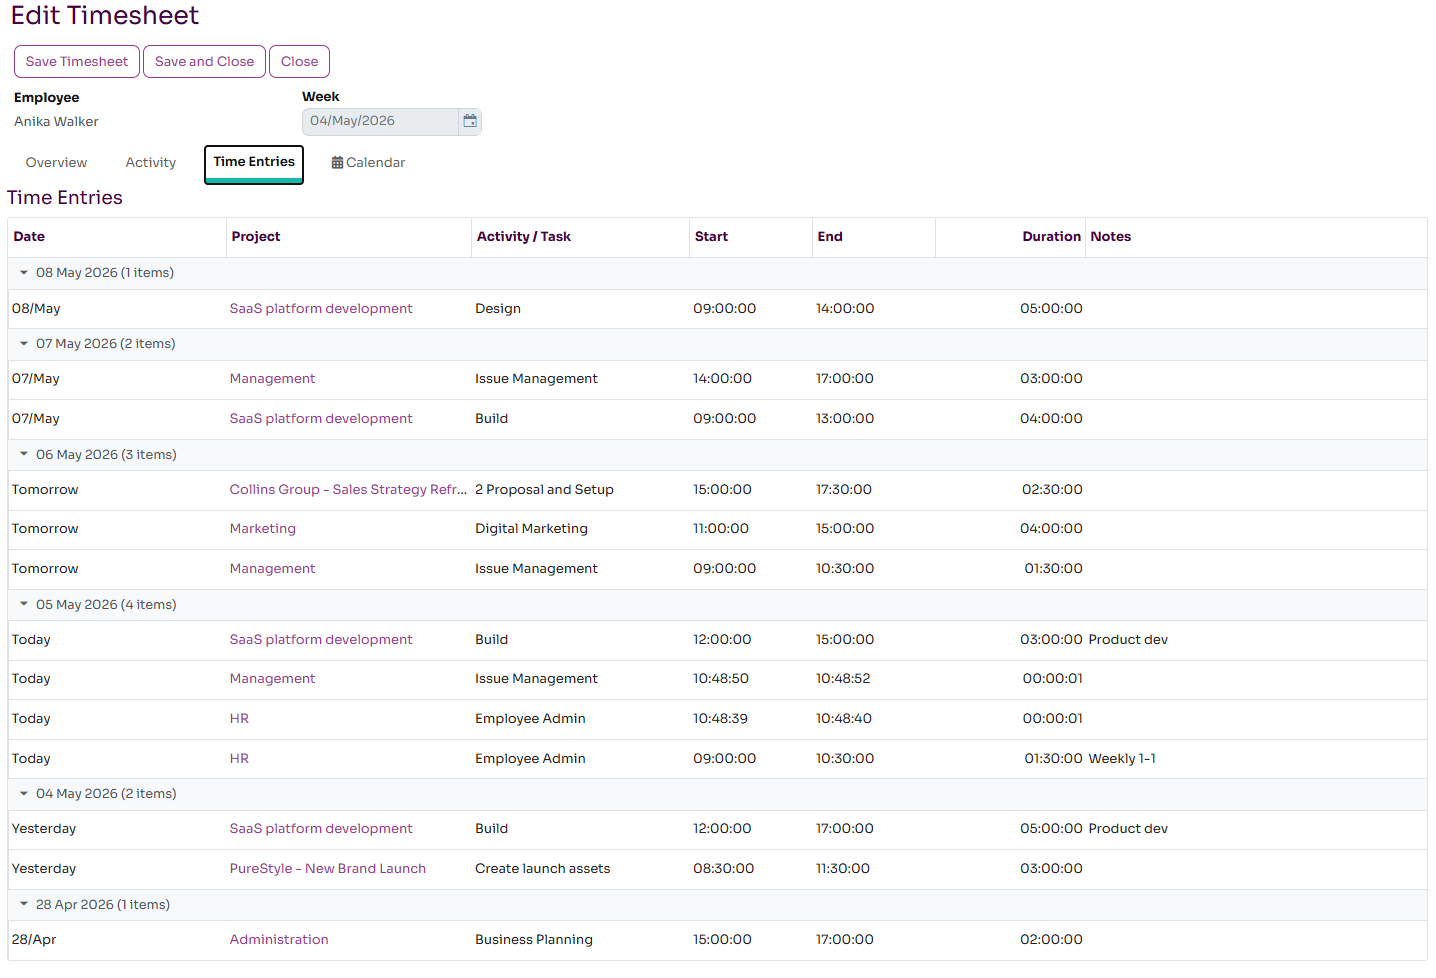
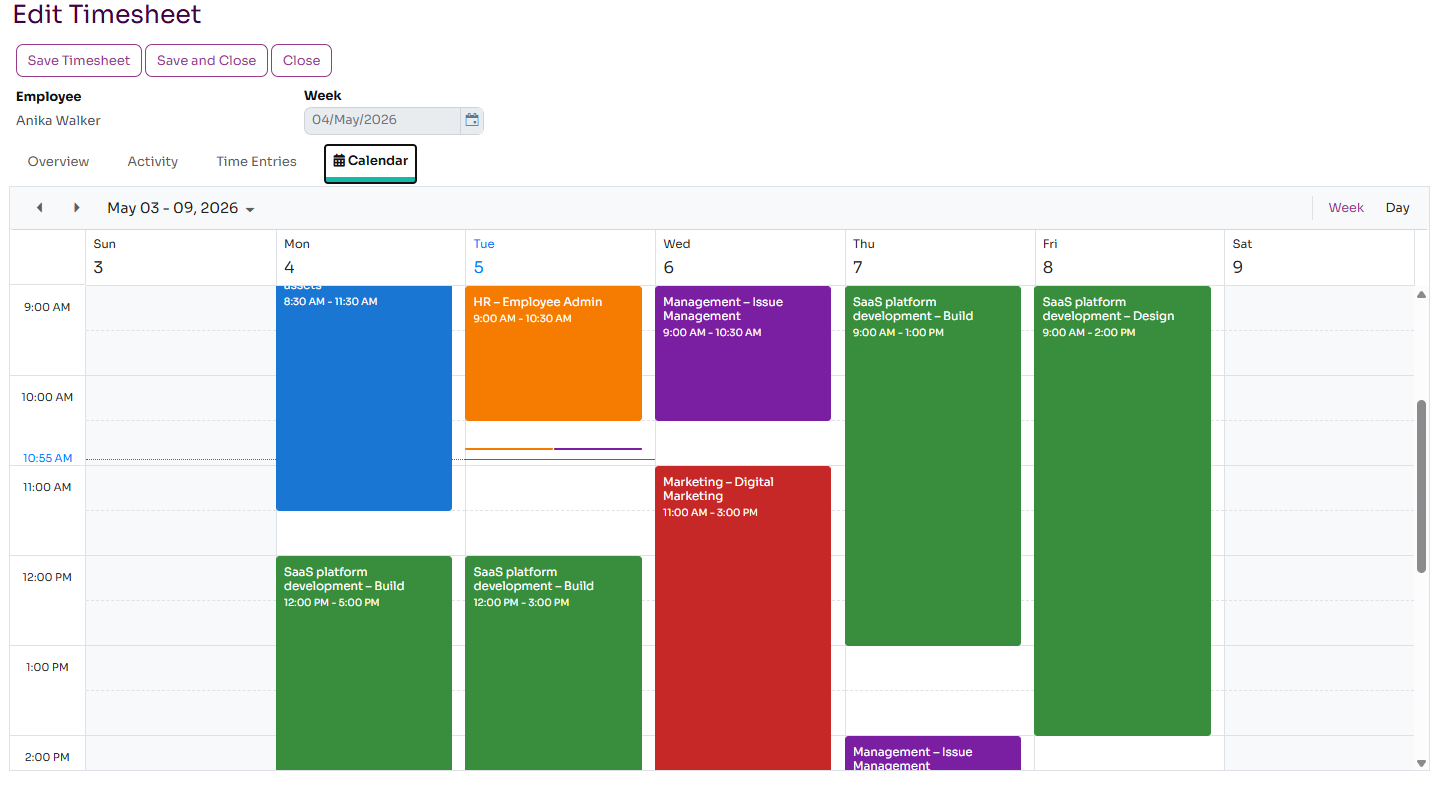
Timesheet Activity and Time Entries
The timesheet page has a set of tabs that shows activity for the resource in that week:
- Overview: shows the hourly timesheet data that can be edited.
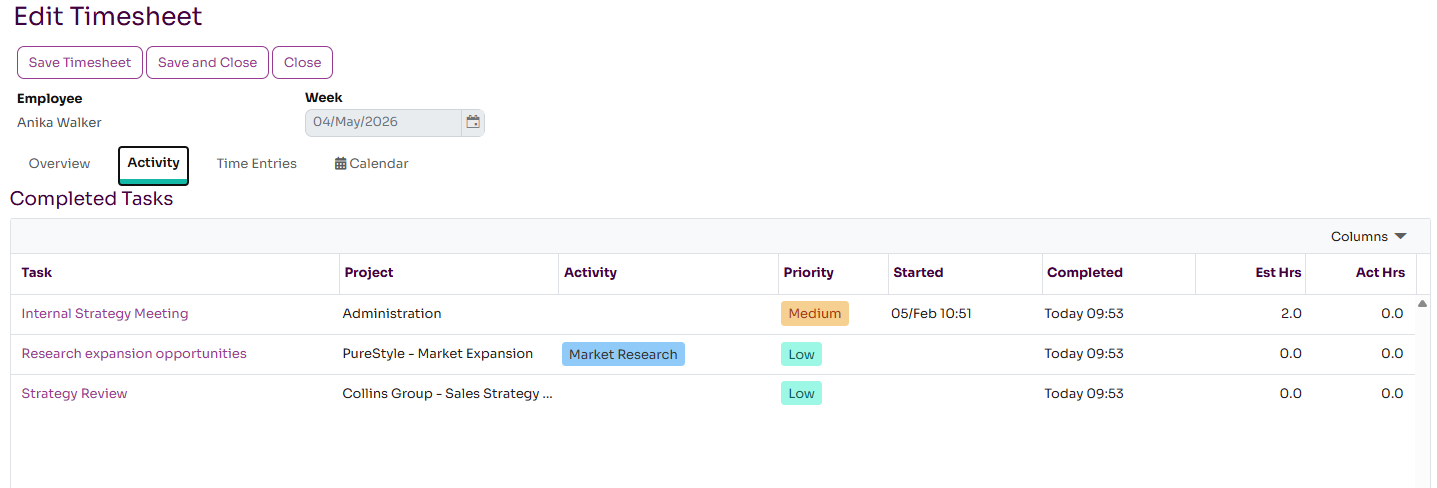
- Activity: this shows project tasks completed by the user in that week
- Time Entries: this shows all the task timer entries for that week that have fed into the timesheet.
- Calendar: this shows the timer entries in a weekly calendar view
Creating a Timesheet
Generally timesheets will be created automatically for a resource and a week when work is scheduled to them. The timesheet will be initialised with the correct activities for the resource.
If the timesheet doesn't exist, you can create a new Timesheet by pressing the Create New button on the Timesheets page or on the My Status page. This will load up a new timesheet with you as the default employee and for the current week. Before you can add any time to the timesheet, press the Load Timesheet button; this will initialise the timesheet with a default set of activities. If the timesheet already exists for that week and employee, it will be displayed.
The timesheet should default to a set of activities that you have used before and have scheduled time against.